Wednesday 30 October 2013

Wedding Inspiration- Magpie Calls Pretties.


Hello lovelies.

This week's post was meant to be done last week, but being overwhelmed by sickness meant it was delayed. I am all better now and want to celebrate the engagement of my good friend  B by doing a post that is wedding related. Over the last year and a bit I have created some pieces which can be used for weddings. Either by the bride or by bridesmaids or flower girls. The following pics are some of the creations which I feel would work well for weddings (including my handmade and constructed bouquets with fabric flowers). There are head-dresses, bracelets, brooches or clips,sashes and bouquets.

Enjoy and let me know if there are other items which would be wonderful for a wedding range (I am slowly working towards making a full range for boutiques and such). Also B has said she wants me to make her a wedding fascinator, I am sooooooo excited!


Each flower is made by me, and the entire bouquet is made from scratch , the red and white bouquet is out with a fellow crafter for promotions, will get it back and take proper pics soon.

Fascinators and hair sashes, all handmade and beaded by me.

Flower crown, cuff and hair clips- perfect for the bride or bridesmaids.

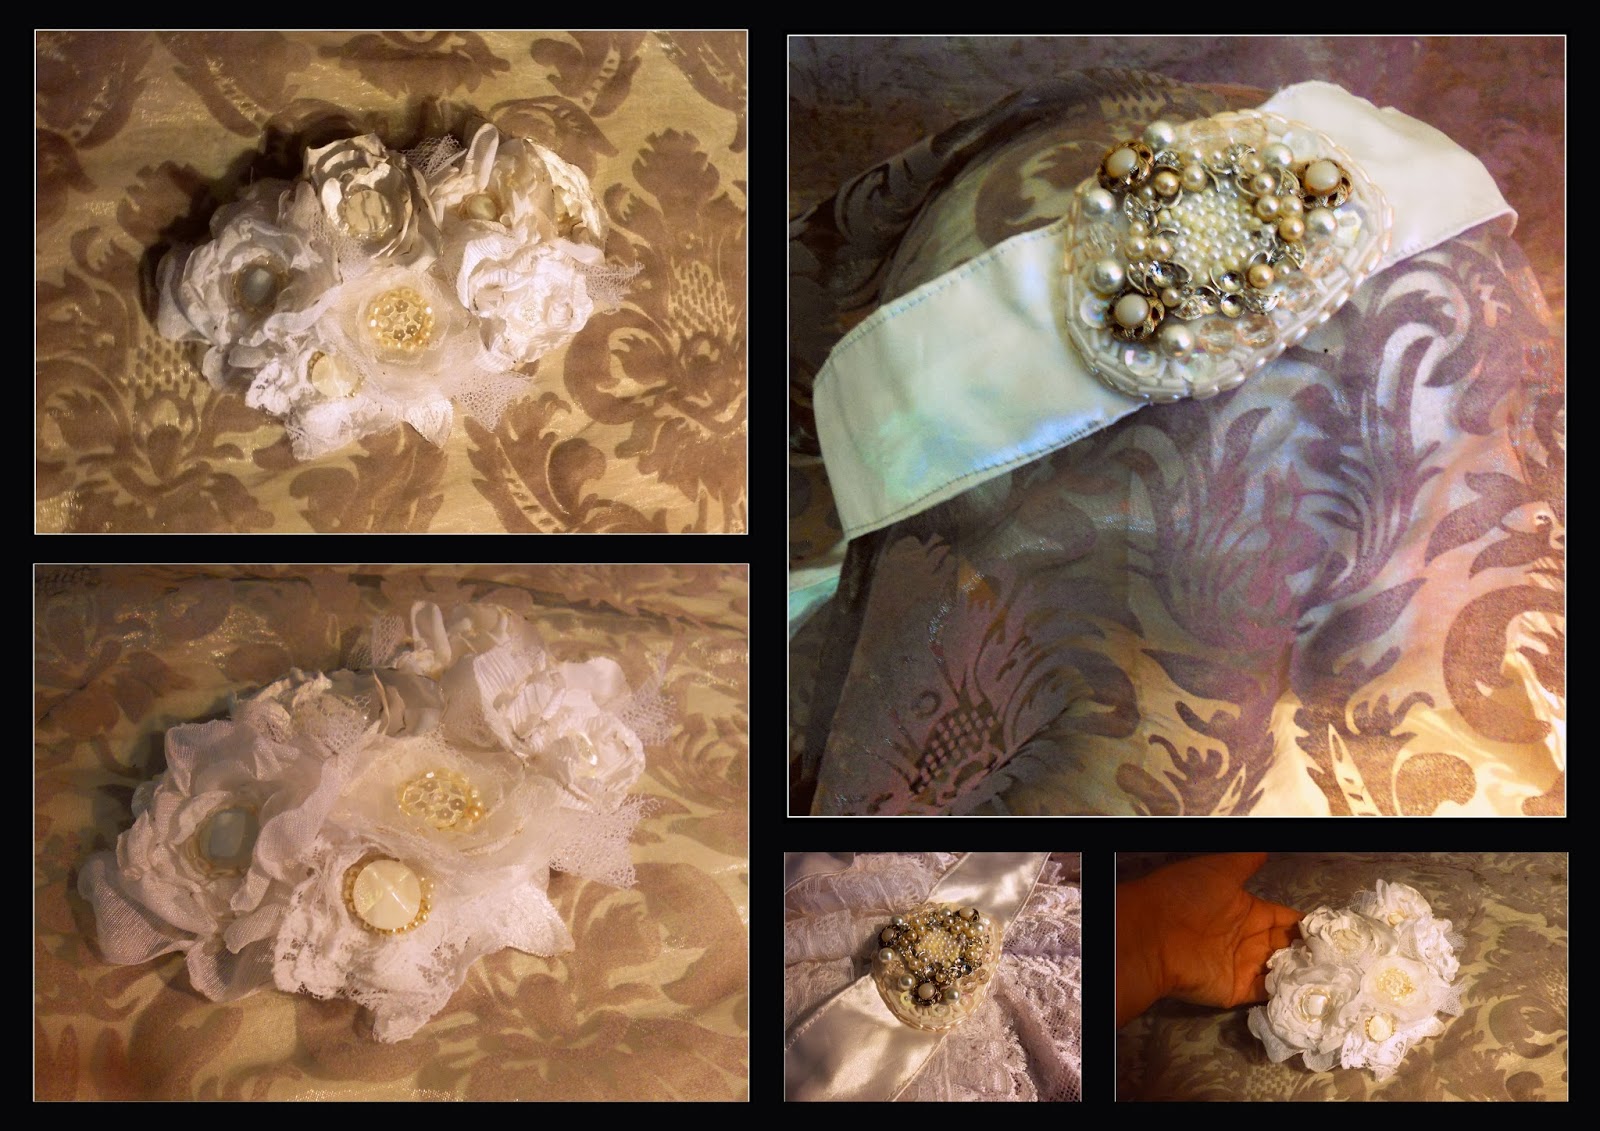
Sashes are a lovely way to give a personal spin to a simple wedding or bridesmaid dress. It can be co-ordinated to the flowers or the wedding colours, or with the wedding dress tones  for interest.They can be as simple or ornate as you want!

 
Well Congrats to my friends B and D and I hope they enjoy their engagement and have fun planning their special day!

love and shimmies


Wednesday 23 October 2013

Inspiration- October 2013


Since I am currently sick in bed and don't have the energy to work on the blog post I originally wanted to put up today I will be doing an inspiration post on what is inspiring me at the moment. The original post will be up next week;)

So enjoy , use the comment box below to tell me what is inspiring YOU lately.

BODY ARMOUR:

I love the idea of modern Armour with vintage or ancient touches to it, so it can be worn in a modern way. I think Olivia Kissel (top left) is the Queen of this look,and her pieces are so versatile and can be worn in so many ways,specially if you are  a dancer.

pic credits:
olivia Kissel
Anbenna
Steampunkd
Contemporain jewellery

BEADED DRESSES:

I am loving dresses which are heavily beaded and have texture and detail. They are beautiful and inspire me to be a better beader and more detail orientated in my work. I love that you can find both modern and vintage examples of this,and sometimes modern dresses with vintage inspired detailing! YUM!

pic credits:
Isla Fisher
A game of clothes
Lillian Powell
Marchesa

CROWNS:

I love these takes on crowns, yes they may be over the top but who wouldn't want to be a Princess and rule with these on their heads?

Pic Credits:
Cutlery crown
Silver crown
Gold crown

GOTHIC RED RIDING HOOD:

This has been inspiration for my solo  for our end of year showcase. You will have to wait and see what I do and what I look like in it! But black and red is the predominant theme.

Pic credits:
red riding hood
black hood coat
gothic makeup

So those are just some of the things which are on my "muse" board lately. Hope you are inspired yourselves!

love and shimmies

Thursday 17 October 2013

Thrifting Fun- Second Treasures


Today's post is a collection of pics I took at the second hand store in Hillcrest called Second Treasures. A regular smorgasbord (don't you just love that word?) of bits and bobs, old and really old, nostalgia, pre-loved, upcycled and interesting stuff. Filled to the brim, you really have to spend time looking at the nooks and cranny's to make sure you don't miss out on some hidden treasure.

I love places like this, that make you feel like you are on a treasure hunt, and that every item has a story. So enjoy my pics and make sure to go and check it out yourself. They also fix up old furniture so if you have a few pieces that need a new lease on life be sure to check them out!


Fabulous right?

much love and shimmies

Wednesday 9 October 2013

D.I.Y- Wire Fairy Wings Tutorial


Hi Everyone,
Today's post is continuing on the D.I.Y fairy costume I made for a friend's recent 30th Party. Last week I did a Tutu tutorial here . This week we concentrate on the fairy wings.

You will need:

A Roll of pliable wire
Pliers
Tulle
Clips
Ribbon
Rhinestones
Elastic

optional- glitter glue, washi tape, and other decorative elements.

Process:


Finished Product:


And once again the complete look with Tutu and Wings!

I really enjoy making cool things that end up being unique. it means I never have to have that fear of arriving at a party or event in the same outfit as someone else! Plus the satisfaction of seeing the end product always makes my day!

Hope this was useful and inspiring to you all.

Please either post a link to any wings you may make in the comments or send me a pic on mail at magpiecalls@gmail.com

love and shimmies

Wednesday 2 October 2013

D.I.Y- Tutu Tutorial


This week I have a fun D.I.Y to show you.
An Adult sized tutu tutorial (because why should kids have all the fun?;))

The back story as to why I decided I needed a tutu after never having owned one ever (even as a kid) goes like so- My friend K decided for his 30th to have a kid-themed party. We had to go dressed as we would go as kids to a party. So of course I jumped on the opportunity to have fun with the dress-up theme and decided to do some D.I.Y to make something that worked for me. I wanted to be a "fairy princess". For that I needed a tutu and wings.

I had seen some pinterest pins and blog-posts on the "no-sew" tutu technique, and decided to try this out for an adult sized tutu.

The following pics explain step-by-step how to make your own tutu fit for a fairy princess!


FINISHED PRODUCT:


Ok so here is my final look for the party- It was a freezing cold day hence the long sleeves. The tutorial for the wings will be on the blog next week! 


Hope this inspires you to bring out your inner princess! It should also be easy to make for younger girls and children. A simple and easy D.I.Y for even the most craft challenged out there. 

here is a pic of  a birthday tutu I made for my little friend E a couple years ago using the same technique. Isn't she cute? 

If you have any questions or need an extra step to be shown let me know!

Remember to check next week for the wing tutorial. 

Happy dress up- specially as Halloween and parties are just around the corner! 

Also if you do make a tutu from this tutorial please either link to it in the comments or send me a pic via my email magpiecalls@gmail.com I would love to see your versions! 

much love and shimmies